


2 Ways To Increase Stitches in Knitting
4 min read time
Hello crafters,
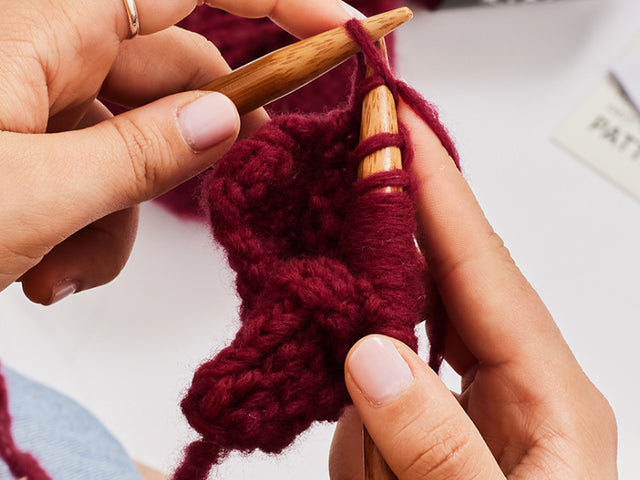
Increase stitches. What are they and why do we use them in knitting? Like decreasing, increases are used to shape a piece of knitting, this time making the piece larger by adding stitches. There are lots of ways to increase the number of stitches on your needle; some are barely perceptible and don’t disrupt the pattern, while some are more visible and can be used decoratively. Most increases are worked on the right side of your knitting and two of the most popular are the knit front back (kfb) and make one (m1). While increasing can seem daunting, especially for the beginner knitter, it’s really not as hard as it sounds.
BEGINNER’S GUIDE - HOW TO KNIT FRONT BACK (KFB) AND MAKE ONE (M1)
Knit front back (kfb)
One of the most common increases, found in over ten Stitch & Story patterns, is the knit front back (kfb). A relatively easy way of increasing the number of stitches on your knitting needle, this increase turns one stitch into two by knitting into the front and back loop of the same stitch.

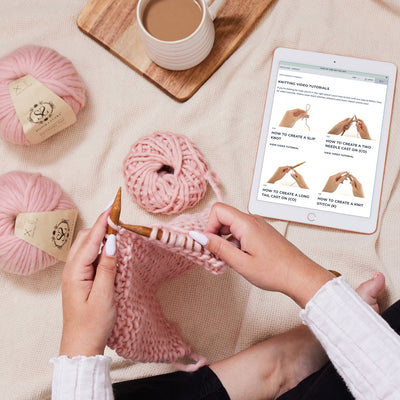
The kfb does leave a somewhat visible bar on the right side of your work so is often used decoratively or at the end of rows where it can be hidden in seams. The Easy Slumber Socks and Freya Fingerless Gloves all use kfb in their patterns. You can watch our knitting video tutorial How To Increase A Stitch (kfb) here.

a) Insert the right needle into the next stitch. Knit one stitch but do not slide the original stitch off the left needle.

b) Insert the right needle through the back loop of the same stitch on the left needle.

c) Bringing the yarn from behind, wrap it around the tip of the right needle anti-clockwise towards the front.

d) Draw through a loop by going into and out of the stitch. (As you would to make a knit stitch)

e) Slide the left stitch off the left needle. You have now increased by one stitch.
Make one (M1)
The Bonny Booties Knitting Kit is currently the only Stitch & Story pattern that uses the make one (M1) increase. The increase itself isn’t any more complicated than a kfb but it looks and behaves differently so is better suited to certain projects. The Bonny Booties is a garter stitch pattern that requires increases in the middle of rows. In this instance the visible bar created by a kfb stitch disrupts the garter stitch pattern whereas the M1 is practically invisible and helps with the shaping of the shoe.

An M1 increase is made between two stitches by using the horizontal loop of yarn between the stitch on the left needle and the last stitch knit off the left needle. It can lean to the left or right. This is most visibly obvious in stocking stitch, where the increase is created on the knit side. An M1L (left) picks up the horizontal loop from front to back and is knit through the back loop. An M1R (right) picks up the horizontal loop from back to front and is knit through the front loop. The M1L (shown below) is the easier of the two. Most patterns don’t specify more than M1 meaning you can use either method but it is always best to check the pattern abbreviations section for any specific stitch explanations before you begin. In the Bonny Booties pattern you’ll see that M1 refers to the left leaning version. Once you’ve practiced this increase a few times you’ll realize just how easy it, and the Bonny Booties pattern, is.

a) Insert the left needle, from front to back, into the horizontal loop between the last stitch knit and the next stitch on the left needle. The horizontal loop will now be resting on your left needle as a stitch.

b) Insert your right needle into the back loop of this stitch. By knitting through the back loop it twists the stitch, tightening it to avoid a hole in your project and making it virtually invisible.

c) Bringing the yarn from behind, wrap it around the tip of the right needle anti-clockwise towards the front.

d) Draw through a loop by going into and out of the stitch. (As you would to make a knit stitch)

e) Slide the left stitch off the left needle. You have now increased by one stitch.
Kfb vs M1 - can one be substituted for the other?
Kfb and M1 both do the same basic thing; they increase the number of stitches on your needle. However, they look and behave quite differently. The principal difference between the two increases is that kfb uses one stitch to make two whereas the M1 does not use any, the increase being made between stitches.
In practice, if you have four stitches on your needle and you knit one followed by a kfb then you will have two stitches left to knit but if you knit one followed by an M1 then you will have three stitches left to knit.
This is a key difference within a pattern because a kfb will use up one stitch of a row/round affecting how stitches are counted and pattern sequences are repeated. It is for this reason that if a pattern specifies a kfb increase then it is best not to substitute it with an M1, and vice versa.

Although they are both increase stitches, kfb is not the same as M1 and a designer will usually have several reasons for selecting one increase stitch over another in a pattern. Even if your mathematical skills are advanced enough to adjust a pattern for an alternate increase, doing so will change the overall look and feel of the item intended by the designer.
From a visual point of view, while an M1 is virtually invisible it can occasionally create a small hole similar to a yarn over. Meanwhile a kfb leaves a distinct bar in knit fabric.
Additionally, it is unlikely to see an M1 in patterns that require multiple increase stitches in succession. This is because you are pulling on the horizontal loop between stitches to create an M1 and multiple M1s back-to-back would tighten the row below causing the fabric to pucker.

Increase stitches, like decreases, are an important part of knitting and while everyone will have a favorite method for increasing it’s advisable to use whatever increase stitch is specified in a pattern. To make sure you’re clear on what increase you're being asked to use it is best to thoroughly read through a pattern before you start, paying close attention to abbreviation sections and stitch descriptions. For help on understanding and reading patterns you can read our dedicated blog posts - Part 1 and Part 2 - here. While kfb and M1 are different in practice, one isn’t really any more difficult than the other. With a little practice you’ll be able to do both easily and hopefully feel confident enough to tackle any pattern irrespective of the increase stitches required.
Happy crafting!

Handmadebyhafsa - A Story Maker
2 min read time
Craftyparenttools - A Story Maker
2 min read time
Top 5 Granny Square Tips & Tricks
1 min read time
How do I start?
1 min read time
Setting your 2024 Crafting Intentions
3 min read time